Categories
Breakfast French Kids favorite Snack Vegetarian

Leek, Potato & Goat cheese Galette with Pistachio Crust

Last few days have been very challenging, I consider myself a very strong person but it is amazing how vulnerable one gets when they are emotionally invested. I know it will be alright eventually but right now it hurts.  I really needed to do something that takes my attention away. So I have started lifting weights and  decided to try at least one new  recipe every week.

I love love brunches. You can try different things than your usual lunch and you are not rushed to have everything ready. Perfect for lazy mornings and occasions like Mother’s day. On the occasion of Mother’s day, I am sharing this recipe that can be a perfect addition to your brunch table. You can make the prep ahead of time and then comes together in less than 15 mins.

I love nuts, and especially pistachios. I am in love with combination of  green, pink colors you see in these raw nuts. I recently made a nice torte with pistachio crust and it was a major hit at my work.  Todays recipe uses the nuts in the crust, giving it a unique toasty flavor and crunch.


I had seen this recipe on Bon Appetit and have been wanting to make it. I have grown fond of goat cheese recently and loved the contrast of the tangy, creamy goat cheese against the caramelized leeks and sweetness of honey.

Goat Cheese & Leek Galette with pistachio crustPistachio Galette


Ingredients

For the dough

  • ½ cup shelled pistachios
  • 2½ cups unbleached flour
  •  1 teaspoon kosher salt
  • 1 teaspoon sugar
  • 1 cup (2 sticks) chilled unsalted butter, cut into pieces

_MG_3035

Toppings

  • 1 tablespoon olive oil, plus more for drizzling
  • 1 large leek, halved lengthwise, white and pale-green parts only, finely chopped
  • ¼ cup  heavy cream
  • 4 ounces goat cheese
  • 2 garlic cloves, finely chopped
  •  2/3 Kosher salt, freshly ground pepper
  • 4 tablespoons coarsely chopped dill, plus more for serving
  • 2 large Yukon Gold potatoes, thinly sliced
  •  1 large egg, beaten to blend Honey (for drizzling)
  • Crushed szechuan peppercorns
  • Flaky sea salt (optional; for serving)_MG_3039

Method

 Dough

  • Pulse pistachios in a food processor until coarsely ground. Add flour, kosher salt, and sugar and pulse until combined.
  • Add butter and pulse until a coarse meal forms.
  • With motor running, slowly add ½ cup ice water and process until dough comes together.
  • Transfer dough to a work surface, form into a ball, and flatten to a disc.
  • Wrap dough in parchment and chill 30 minutes.

Topping

  • Preheat oven to 400º. Heat oil in a small skillet over medium-low; cook leek, stirring occasionally and being careful not to brown, until just softened, about 5 minutes.
  • Meanwhile, mix cream, goat cheese, and garlic in a medium bowl until smooth. Season with kosher salt and pepper. Line a rimmed baking sheet with parchment.
  • Transfer dough to a work surface and divide into 4 pieces.
  • Working with one piece at a time, roll out to an 8″ round.

Layer it up

  • Using an offset spatula, spread one-quarter of the goat cheese mixture on dough, leaving a 1″ border.
  • Top with 1 Tbsp. dill and a thin layer of potato slices. Drizzle with oil and season with kosher salt.
  • Top with one-quarter of the leeks. Fold edges over, overlapping slightly.
  • Carefully transfer galette to prepared sheet. Repeat with remaining dough and filling.
  • Brush crusts with egg wash. Bake galettes until crusts are golden brown and potatoes are soft, 30–40 minutes. If you want to make a vegetarian version, you can skip the egg and instead use some water mixed milk to brush the edges.

Cut slice

Original Recipe:

http://www.bonappetit.com/recipe/goat-cheese-leek-and-potato-galette-with-pistachio-crust#recipe-ingredients

Categories
Maharashtrian Side dish Vegan Vegetable curries/daal Vegetarian

Savory butternut squash

I have been making an effort to eat local and eat what is in season. To help with this initiative, I only shop at the farmer’s market as much as I can. The only exceptions are curry leaves and mango.

My kids sometimes complain that I always find some type of squash in the market, they are right, you will always find some kind of squash in the market. The butternut squash is typically available in fall. The market I go to, one farmer carries organic apples and different kinds of squashes. I love butternut squash since it holds its shape fairly well even after cooking.

When I was ready to cook this squash, my friend Hrushikesh posted this recipe. This recipe reminded me of the subji that is served as a Prasad ( a blessing) at a a very famous temple. I visited it when I was in 7th grade. I fondly remember sitting on the floor and eating this subji with thick whole wheat rotis on a plate made with dried leaves. I did not know what Bio degradable or compostable meant, now I appreciate that plate even more.

So I decided to try the recipe right away and the outcome was delicious. It can be easily tweaked to be eaten as a fasting food as well.

Savory butternut squash

Pumpkin Subji

Ingredients

3/4 kgs of pumpkin chopped in squares of about 2″ x 2″ (peels on)
3/4 cup  grated dried coconut
1 tbsp Poppy seeds ( खसखस )
2 green chillies finely chopped
2 medium sized dried chillies
1 tbsp  cashews chopped
10-15 fenugreek seeds
2 tsp Corriander powder
1 full stem of curry leaves
2 tbsp Raisins
1/2 cup of water

For tempering
1 1/2 tbsp oil
1 tsp cumin seeds
1/2 tsp turmeric powder
A pinch of asafoetida

Method

Peel the squash and cut in cubes.

If you are using pumpkin, you can leave the skin on as it helps keep the cubes intact and does not get mushy.

Heat the oil in a wok. When hot, add cumin seeds, turmeric powder and asafoetida.

Add the raisins, curry leaves, green & red chillies, cashew nuts, fenugreek seeds,poppy seeds and roast it for about 2 mins.

Now add 1 tsp of corriander powder (the remaining 1 tsp goes in at the end) and roast it for another minute or slow on a low flame.

Add a few drops of water if it starts to burn.

You can add more chillies if you like, since the squash has its natural sweet taste, sugar or jaggery is not required
Now add the cut pumpkin cubes, there’s no need to steam it as these cubes do get cooked well.

Add 1/4 cup of water and cover this with a lid for about 3-4 mins. Check after that add some more water and let it cook for another 4-5 mins or until done.

Add the roasted dry coconut & 1 tsp of Dhaniya powder.

Cook it till its done.

Serve it hot with roti or Teekhi puris.


Categories
Appetizer Indian Vegetarian

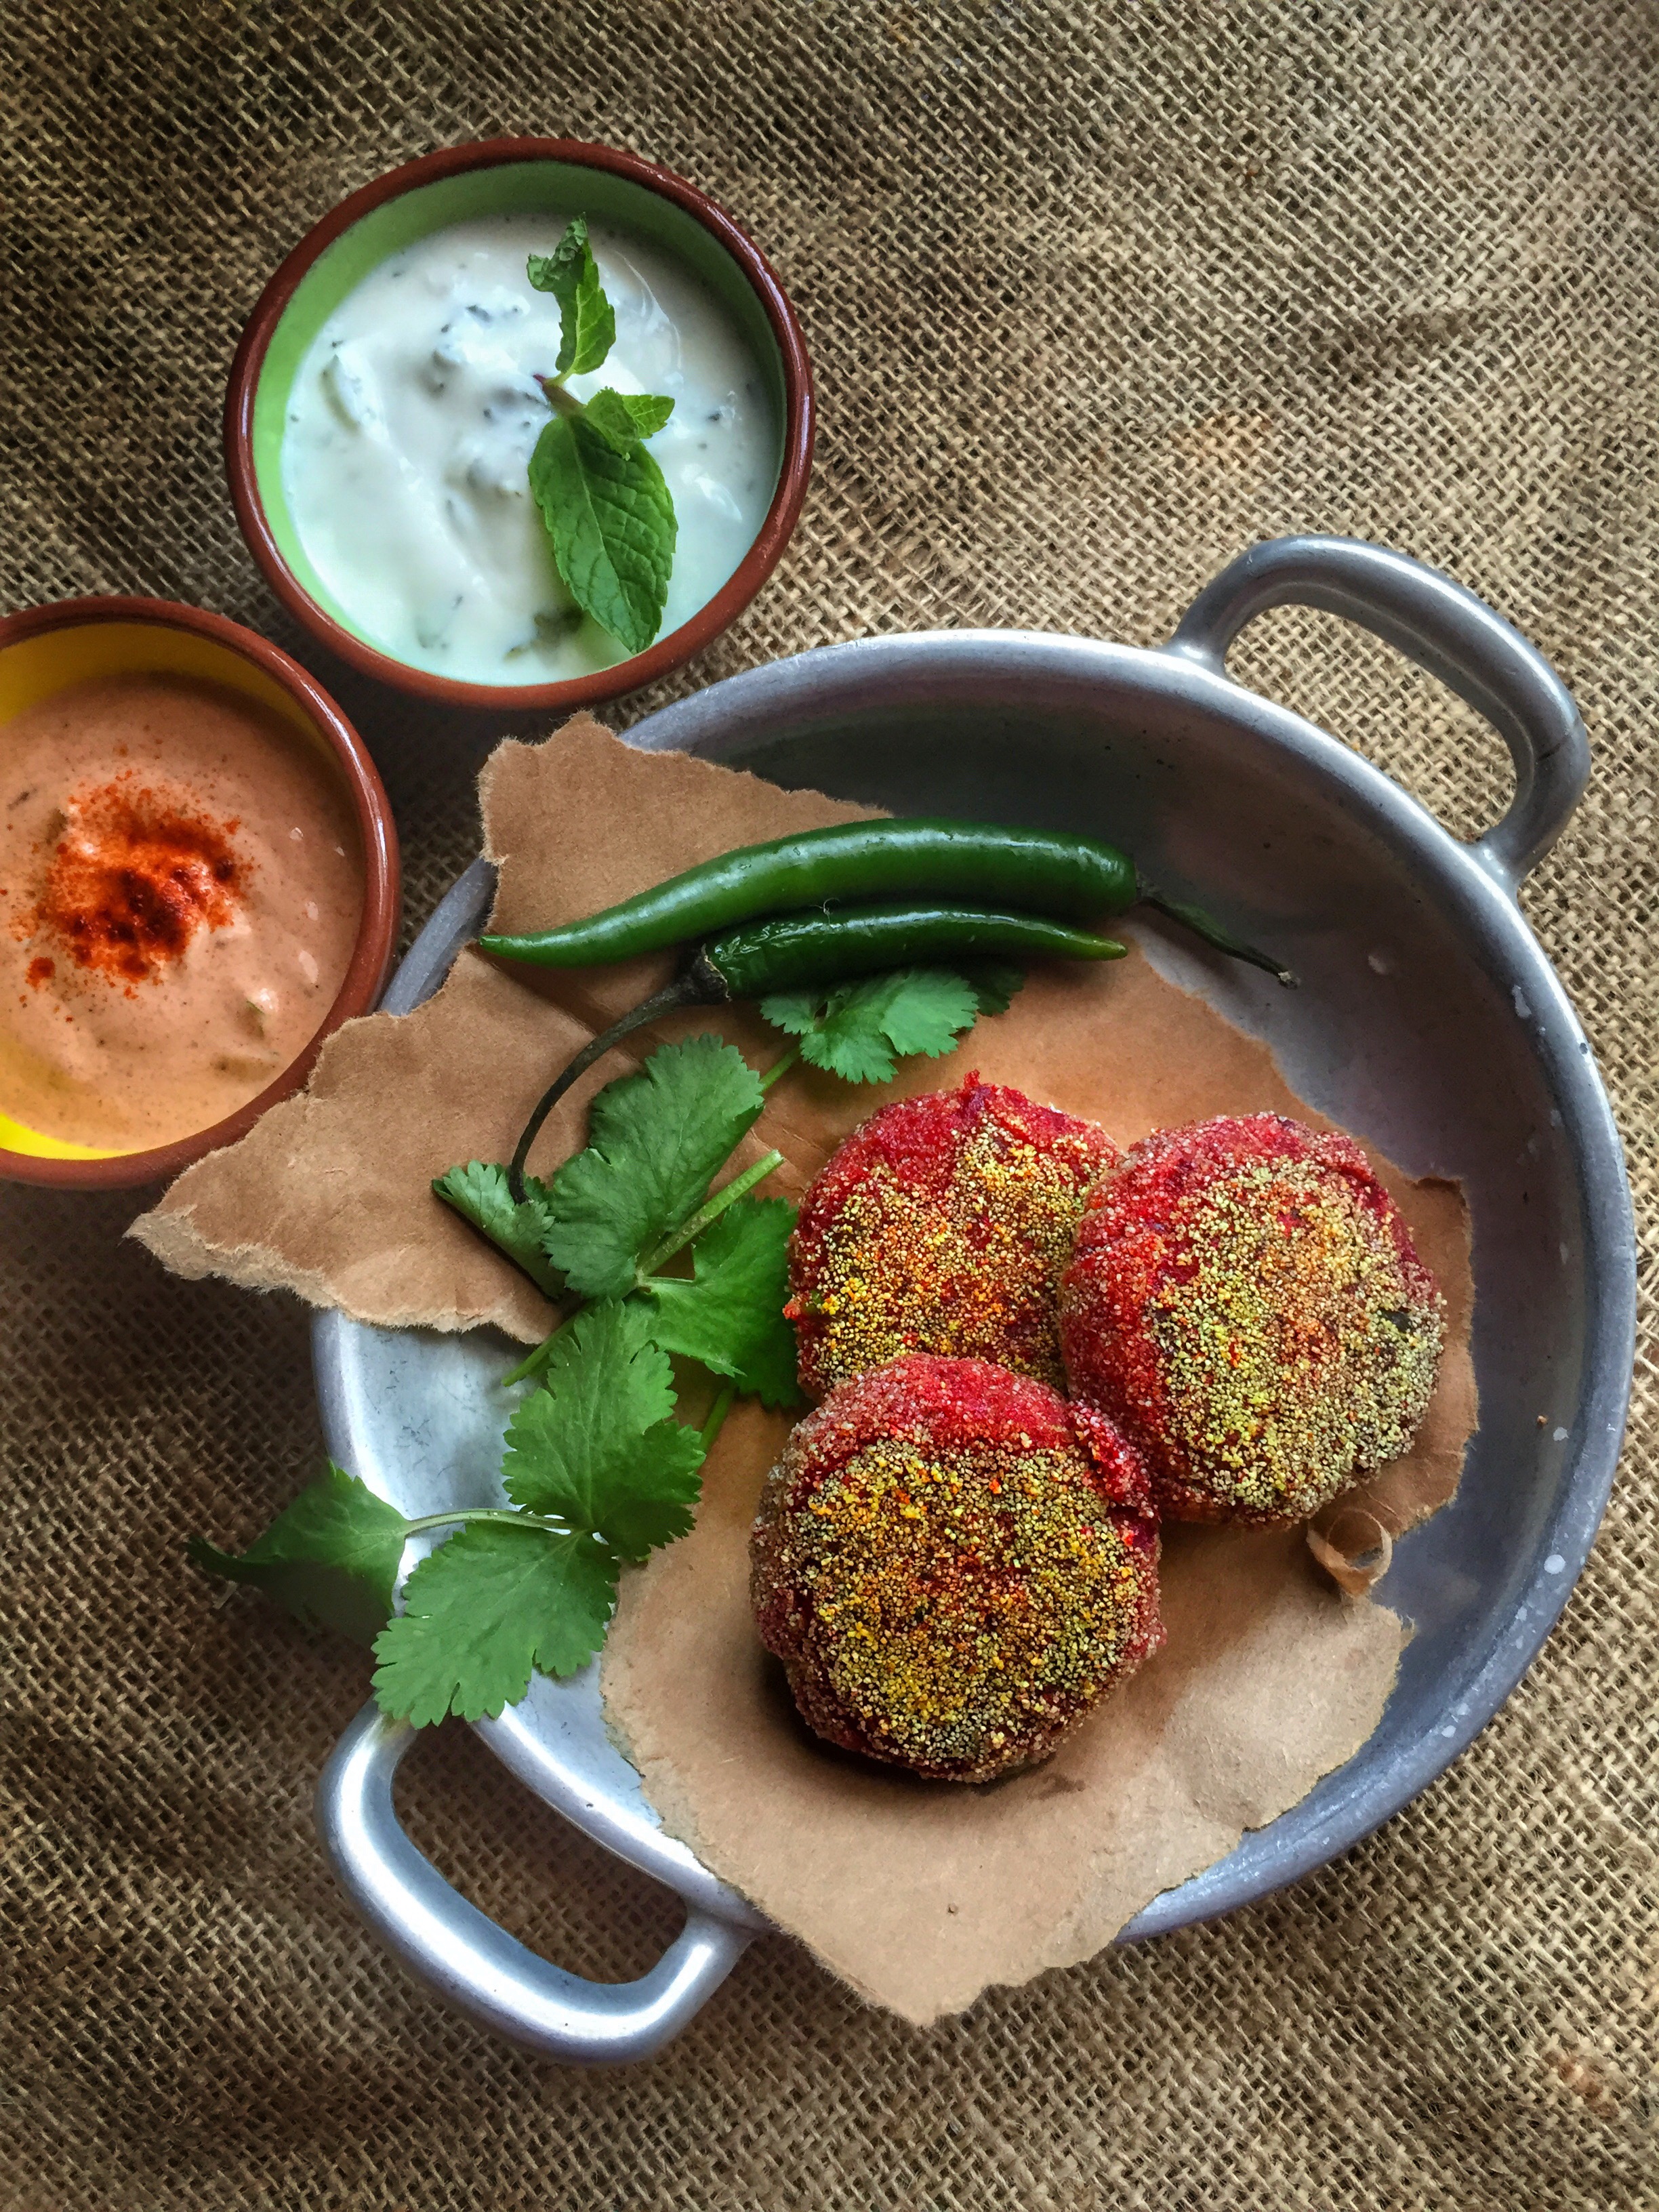
Beets-oats tikki pattice

It was a lazy Friday evening. Although it was gorgeous outside, all of us were super lazy. After a long day of work, that swing was calling out to me, it said come and relax with me with a nice book, may be a glass of wine. 

Recently I have been obsessed with Spanish music. I am trying to learn Spanish and listening to the famous Spanish songs helps. My favorite these days, ‘Quizas, quizas, quizas‘by Andrea Bocelli & Jlo, it oozes with romance and feelings of love & longing. The song was playing in the background, which made me want to just close my eyes and relive some very happy moments of the past couple of days. 

But it also made me long even more for those moments. 

I was willing to give into the temptation, that is when my stomach growled. It said, don’t you want something nice to go with that glass of wine and the book. 

I opened the fridge and there was pretty much nothing. I was ready to give up. I said today I am going to be bad and just eat popcorn or cereal or bread and jam for dinner. Just then I heard these beats call out to me, ” hey you got us from the market, remember? You can not ignore us.”  So I decided to make something with beets. Just then I rememberd the left over steel cut oatmeal from this morning. 

Suddenly I knew what I was going to make. 


Ingredients

2 beets

1/2 cup of cooked steel cut oats 

1 tsp red chili powder

1 tsp chaat masala

1tsp amchur powder

1/4 tsp ginger garlic paste

1 tbsp chopped cashews

1 green chili chopped

1 tbsp chopped cilantro

Salt to taste 

2 tbsp sooji or cream of wheat

Method 

Grate the beets and squeeze out the excess water. You can add that your smoothie or soups. 

Mix all the ingredients except the sooji and mix thoroughly. All the spice proportions are per our taste, you can change as you like. 

Take a plate and spread the sooji on the plate. 
Make lemon size balls with the beet batter and flatten it out. Make sure you wet your palms so that the dough does not stick. 

Dip the patties in the sooji and shallow fry till golden. Make sure you cook on a medium flame so the beets have a chance to cook.

  
Dips 

I love making these dips. They come together in minutes and are perfect for such appetizers. 

Smoky paprika dip-

Take one chipotle chili( I use the one from the can, that comes in the adobo sauce). Chop it fine and mix with yogurt. Add some roasted cumin powder and salt and the dip is ready. 

Mint- garlic dip-

Take chopped mint and one small crushed clove of garlic and add to a bowl of beaten yogurt. Mix well and add salt to taste. 

I am enjoying these with a glass of wine, my feet up on these pillows. What more can one ask for?


Categories
dessert Fusion Persian

Pistachio tart with Rose-orange blossom custard

We as a family just love food, we are one of those who live to eat. We love trying food at new places,trying different cuisines. We try to find small hole in wall places and prefer those over big chain restaurant. One such favorite of ours is a kabab place,’Isfahan kabob’ not too far from where we live. Last time when we were there, we enjoyed our dinner ( as usual clean plates), but all of us were craving for desserts. Isfahan, does not carry any desserts but there is a small cafe, Haleh bakery ,nearby that has just the best desserts you can think of. It is a persian place which carries great treats with some unique flavors. We can not ever decide which one of those is our favorite, there are just too many amazing ones to chose from. It has a cute little courtyard where you can sit and enjoy fragrant persian tea with these delectable pastries.

At work we celebrate ‘pi-day’ and every year I make traditional pie. This year decided to make something new and that is how this recipe came about.

Today’s recipe takes the inspiration from one of the cookies we ate at Haleh, I don’t remember the name but it is a buttery soft cookie flavored with cardamom, dates and other yummy things.I just love the those flavors come together so I decide to try something today that has those flavors.This is a very easy recipe but needs patience, but I think it is worth it. 

Pistachio Tart with rose & orange blossom custard  

Ingredients

Tart

1 1/2  cup  unsalted pistachios

1 cup  almonds

1 egg white

1/4 cup sugar

1 pinch of salt

1/2 stick melted unsalted butter

1/8 tsp ground cardamom

Custard/filling

1 1/2  milk plus couple of tbsp

7 egg yolks

7 tbsp cornstarch

1/2 cup granulated sugar

1 tbsp orange blossom water

2 tbsp rose jam

Method

Pre heat the oven to 400F

In a food processor pulse pistachios and almonds separately, making sure that it does not turn into a paste. the texture should look something like couscous.


Mix the powdered nuts with the melted butter, sugar, salt and egg white. Mix it till it comes together.
Add the mixture to a 9inch  tart pan and spread it evenly.

    Bake for 12 mins and add a 1-2 min if needed after checking. I baked this shell for 15 mins and I think it turned out a little darker than I would have liked. So watch after 10 minutes of baking.

_MG_2632

Let the shell cool completely.

While the shell is cooling, let us prepare the custard.

Heat the 1 1/2 cup of milk on low heat, make sure you turn it off as soon as you see bubbles. If your milk is too hot, you will have a scramble instead of a custard.

Whisk the egg yolks and sugar in a steel pot. Mix the cornstarch in a couple of tbsp of cold milk to make a slurry. Add that to the egg yolk mixture.

Take the heated milk and add to the egg mixture in a constant stream, whisking continuously. This is super critical since this will ensure that you will have a smooth, velvety texture for your custard.

Cook the custard till it feels like a pudding and not thin.

Strain it in a steel bowl. This step will ensure that if there are any lumps, they are left out.

Now cover the bowl with a plastic wrap. Make sure that the plastic goes all the way to the surface of the custard, this will ensure that there is no crust formed as the custard cools.

img_5083img_5084Cool it in the fridge for at least 2-3 hours.

Take it out and mix the orange blossom water. Depending on the brand and your taste, you can add more or less.

Spread the rose petal jam ( Gulkand) at the bottom. Fill the cooled shell with the custard. I buy Gulkand from the Indian store. Not only does it taste great but also has cooling properties to it, which is why in summer in India and in Persia, people eat desserts flavored with Gulkand.

 Let it set in the fridge for sometime.

You can serve it like this but I decided to top it with some apple roses. I have seen these apple roses popping up on the instagram, pinterest and I have been wanting to try and make them.

If you plan to top them with the apple roses, make sure the custard is thick enough for the apple roses to stay upright.

Apple roses

I feel that knives are super essential in a kitchen and can not only make the job easier but also makes the food look pretty. I have a set of ‘Saber knives’ that I bought from Costco a while ago. I got a cute little knife sharpener as a gift and with that I have been able to maintain the edge.

For making these roses you can either use a mandolin or take a sharp knife and slice the apples paper thin. I did half and half. I started with the knife but ran out of patience and switched to mandolin. Mandolin is another great tool to have. It not only makes the cuts looks pretty but they are also uniform, which makes them cook even too. I love my mandolin especially when I make things like scalloped potatoes.

As soon as you slice them, add them to a bowl of warm water with some lemon juice. The warm water will make them pliable and the lemon will keep them from turning brown.
Roll one slice to form a center and then continue wrapping each slice like a petal to form a flower. I grated some beets and used the juice to color some of the flowers, you can also use red food coloring if you would like.

Some people heat up the apple slices in the microwave to make them soft, which can make them easily pliable, but I feel it also makes them lose the taste and possibly discolor.

I will post a video for making the flowers soon.

Now arrange the flowers in the custard as you go along. You can use combination of apples so the different skin colors add a nice variation.

img_5088-1


Categories
Cookies Italian

Coffee-Almond biscotti

snapseed

This year is supposed to be a El Niño year, which means a lot of rain is expected. We have been hoping that it rains a lot and gives a relief from the drought situation in California. It has rained but not too much, so when this weekend it poured, everyone was super happy.

Rain always makes us think of Pakodas( fried lentil fritters), a cup of ginger tea. Rain makes everything look so pretty. Spring is in the air, flowers everywhere. The wisteria in our garden is looking gorgeous, vibrant with purple chandeliers.

img_5027

It was a very relaxing weekend, we had an amazing lunch at our favorite ethiopian place. They make such incredible food, especially their chicken is cooked so well. We ended that meal with a ethiopian coffee, which is always accompanied with a fragrant herb, ‘rue’. You let the herb seep in it’s flavors in the coffee before you drink it.

img_5028

Talking about coffee, recently my family has been obsessed with coffee. My son has been taking very scientific approach to coffee making. Weighing the coffee beans, freshly ground with handheld steel coffee grinder, water temperature measured by thermometer, even the pour has to be perfect. He looks like Alton Brown every time he makes coffee. He made me a macchiato with a little heart a few weekends ago, so perfectly made.

fullsizerender

On my recent trip to Guatemala, I visited this coffee shop which not only serves amazing coffee but also sells beans from the neighbouring areas. I picked a few pounds from there and we also replicated the same set up at home. It made such an amazing cup of coffee.

IMG_4349I love coffee in many forms whether it is coffee ice cream or Tiramisu or even Tiramisu french toast for breakfast, I love it all. So when we were talking about some cookie to go with the coffee, I decided to make this Biscotti. I love making biscotti for many reasons, you can make it ahead of time, you can make so many variations and they are not fragile so they transport well.

Since I love the coffee flavor, I decided to add it to the biscotti as well.

img_5038

Ingredients

2 3/4 cups of unbleached all purpose flour

1 1/2 tsp baking powder

1 stick of unsalted butter softened

1 cup of sugar

1 tsp vanilla

3 eggs at room temperature

1 pinch of salt

3 tsp instant granulated coffee

1/4 cup unsweetened cocoa

1/2 cup of almonds roughly chopped

Chocolate dip

5 oz of dark chocolate chips

crushed almonds or sliced almonds

Method

Preheat the oven to 350 F.

Sift the flour, baking powder, cocoa and salt together.

Cream the softened butter with sugar.

Add coffee granules and vanilla mix a little more.

Add one egg at a time while the mixer is running.

Scrape down the liquid ingredients.

Add the flour mixture a little at a time. The dough will be sticky at this point. Keep the dough in the fridge so it will firm up and will be easier to handle.

Take the dough out and divide in two parts.

Form two logs of about 2 inch by 8 inch. Remember this will spread as they bake so dont make them wider than 2 inches.

Place the logs on a cookie sheet with parchment paper.

Bake for 25-30 mins.

Take it out of the oven and cool for 30 mins.

Biscotti means baked twice. So as the name suggests, we will be baking these twice.

Using a sharp serrated knife, cut in 1 inch slices.

Arrange these slices cut side down on a cookie sheet and bake again for 15-20 mins. Remember that these will harden as they cool so be careful to not overcook these.

After baking it the second time, let them cook on a rack.

img_5034

Chocolate sauce

Melt the chocolate chips in the microwave, heating in the 30 sec intervals, stirring in between.

Dip one end of the cooled biscotti in the melted chocolate and sprinkle with crushed almonds. Layer them back on the parchment paper till the chocolate is solid again.

These store very well in a airtight container.

Serve with your favorite cup of coffee.


Variation:

You can skip the coffee granules in the batter, and add 1/4 cup of cocoa instead.

You can also make these with no chocolate or cocoa or almonds in the batter, and add 1 tsp of Anise seeds, 1/2 cup of cranberries & 1/2 cup of pistachio instead.


Categories
Condiments Indian Maharashtrian Pickles & Chutneys

Cilantro pesto-Dhaniya chutney

IMG_0637

Do you know anyone who  has the ability to just brighten up the room the minute they enter in. It is their smile, genuine nice attitude or even the way they crack jokes, they just makes the situation nicer.

I cherish such friends, very thankful to have them in my life.

If I had to relate this back to the food, I think condiments are like these special friends. Anytime if it seems like what you have cooked for dinner is just blah, a nice chutney, salsa, dip can come to the rescue and help revive the meal. 

I love condiments of all kinds. I love making yogurt based dips, spicy chutneys, fresh salsas of various kinds. My favorite of all are the spicy condiments.

When my kids were younger everything I cooked was very mild. I am lucky that my kids eat all the vegetables ever since they were babies so I wanted to make sure it stays that way. As a result I would also have to eat very mild food, that was really hard. So I started making chutneys and relishes, these were spicy and complimented the mild food well.

One such chutney is the ‘Cilantro chutney’. You can also call it Cilantro pesto.  My friend Uma taught me this one. What I love about this recipe is all the things needed are usually available easily at home. It takes only a few minutes to make and stays well in fridge for a week, although I must warn you, it is so yummy that it barely lasts a day, usually it is cleaned up quickly.

IMG_0642

Ingredients

  • 1 1/2 cup of washed , cleaned Cilantro
  • 1 tbsp roasted peanuts
  • 2 garlic cloves
  • 8-10 spicy green chilies ( I use thai chilies since I like it spicy)
  • 1 tsp Cumin seeds
  • 1/2 tsp turmeric powder
  • 1 tsp oil

IMG_0635

Method

  • Dry roast the peanuts
  • Heat oil in a pan. Add the cumin seeds and turmeric powder
  • Add chopped green chilies and chopped garlic
  • Saute for 30 seconds, don’t let the garlic or chili burn or brown.
  • Add cilantro and turn the heat off.  Add salt. Cover and leave it to warm through.
  • Grind the peanuts to a powder.
  • Add cooled cilantro mixture and grind to a paste. I like to keep it a little coarse and not grind it super fine.

IMG_0636

It can be used in many ways. I love serving it in the pretty yellow bowl. I bought it in Nepal, we visited Bhaktapur darbar. Amongst many other beautiful carvings and handicraft we also got to see beautiful pottery. It was amazing to see the potters turn the wheel and make these beautiful art pieces. 

IMG_0638

1. Mix it with some sour cream, yogurt or Greek yogurt to make a quick dip. I love it with pita chips.

2. Mix it with butter to make a great sandwich spread. I love to add some sliced avocado and make an open faced sandwich. I also like to add alfalfah sprouts to this, add a nice crunch to this already tasty sandwich.

IMG_0644


Categories
Breakfast

Tiramisu French Toast- dessert for breakfast

IMG_0605-001

One day I was sitting down with a cup of coffee and a toast and I suddenly remembered about a recipe my daughter had read about some where, it sounded delicious. I thought why not try it today. I think it was from buzzfeed so not sure but I think it was from soem blog that said,” Peas and carrots’ or some like that.

I am not a coffee drinker but I love coffee flavored sweets for sure. I love coffee cookies, coffee ice-cream, coffee cake, and of course Tiramisu. I also love bringing in coffee flavor into Indian Dessert, a couple of years ago I made ‘Coffee Kalakand’ , a yummy milk based dessert and everyone loved it. It tasted almost like milk fudge.

I love dairy,it is a world known fact :). I love Mascarpone cheese , I love the sweet creamy flavor and the fact that it is not super tart. I like using it in desserts but also stir in soups, spread on my toast.

So going back to my toast and the breakfast I wanted to make. It is a dessert take on a breakfast food. I call it Tiramisu french toast. Can you imagine how happy and bright the day would be if you eat this for breakfast? My kids loved it, I loved seeing their happy faces.

It has coffee, mascarpone cheese and it is easy to make, what more can one ask for?

Tiramisu French Toast

IMG_3833

Ingredients:
  • 8 slices thick-cut texas toast (white)
  • 5 eggs
  • 1 cup milk
  • ⅔ cup sugar
  • ¼ cup cocoa powder
  • 1 tsp espresso powder ( or instant coffee) + 1tbsp of espresso
  • 4-6 oz mascarpone cheese

IMG_3827

to serve ( all optional):
  • Powdered sugar
  • Fresh fruit
Method:
  • Mix together the eggs, milk, sugar, cocoa powder, espresso and espresso powder. I like to mix the cocoa first with about 1/4 cup of milk into a paste and then add rest of the ingredients.

IMG_3825

  • Using a paring knife, carefully cut a pocket into the bread, It is ok if you poke the knife through, remember the whole thing will get dipped in the egg mixture. I found it helpful to put the slice on the counter as it make it easy to make a pocket with a flat knife on the counter.

IMG_3829

  • Gently spoon in 1-1.5 tbsp of mascarpone. It is important that the cheese is at room temperature,it helps spoon easy.

IMG_3828

  • Pour some of the egg mixture in a shallow bowl.
  • Dip the bread in the cocoa/egg mixture, allowing it to absorb for about 15 seconds per side. I feel if you keep it longer, the french toast gets very mushy.

IMG_3830

  • Heat an omelet pan  over medium heat, and cook the toast for about 3 minutes, flipping and cooking for another 2-3 minutes. The bread will stiffen slightly when it is ready to flip.

IMG_3835

  • Sprinkle with powdered sugar and serve with fresh raspberries and toasted hazelnuts.
Categories
Appetizer Indian

Stuffed Paneer with Khubani Chutney

Apricot -Paneer Tikka

I love it when a recipe looks like a million bucks, tastes like a trillion bucks and yet it is so easy to put together. I also like the fact that you can prepare parts of the recipe and simply assemble it when you are ready to serve.

Today’s dish fits that description very well. I just love how nicely the delicate flavors of the apricot marries with rich home made paneer. Paneer is a form of a cheese, very similar to ricotta cheese but firmer. It is made by curdling the boiled milk with some acid like lemon juice, white vinegar. It is an integral part of the North Indian Cuisine. You see this a lot in the Nawabi or Moghlai cuisine. These cuisines represent the dishes made for the kings and queens of India.

I love cooking with dried apricots. I love dessert made with dried apricot, another Nawabi dish from the southern state of Hyderabad in India, Khubani ka meetha. I will share that recipe some time soon. I also love making stuffed apricots and Apricot Alomond cake.

Back to our recipe today, I got this recipe from a dear friend Harjeet, a very talented chef. I l love how he put together simple ingredients to make delectable food.

I have also been playing with food photography. I recently bought these pewter plates from a flea market, I have used them in the photo today, I love how they contrast the bright yellow tikka.

Waiting...


Stuffed  paneer with khubani chutney

Ingredients:
1 lb Paneer
1 tbsp thick yogurt ( I make mine by hanging plain yogurt in a cheese cloth)
Salt to taste
1 tsp Turmeric

For the paste
2 tsp Mustard oil
1 tsp Yellow chili powder
1 tsp Deegi mirchi power
2 tsp Ginger garlic paste 

For the chutney
Khumani (Dry apricot)chopped 3 tbsp

1 tsp Cilantro chopped
1/2 tsp green chili chopped
1 tsp chopped mint
1 tbsp Sugar
1/2 tsp Black salt
1/2 tsp Roasted cumin seed 


Methods


Apricot chutney

Boil some water and add chopped apricot and cook them for a while till it becomes soft.
 
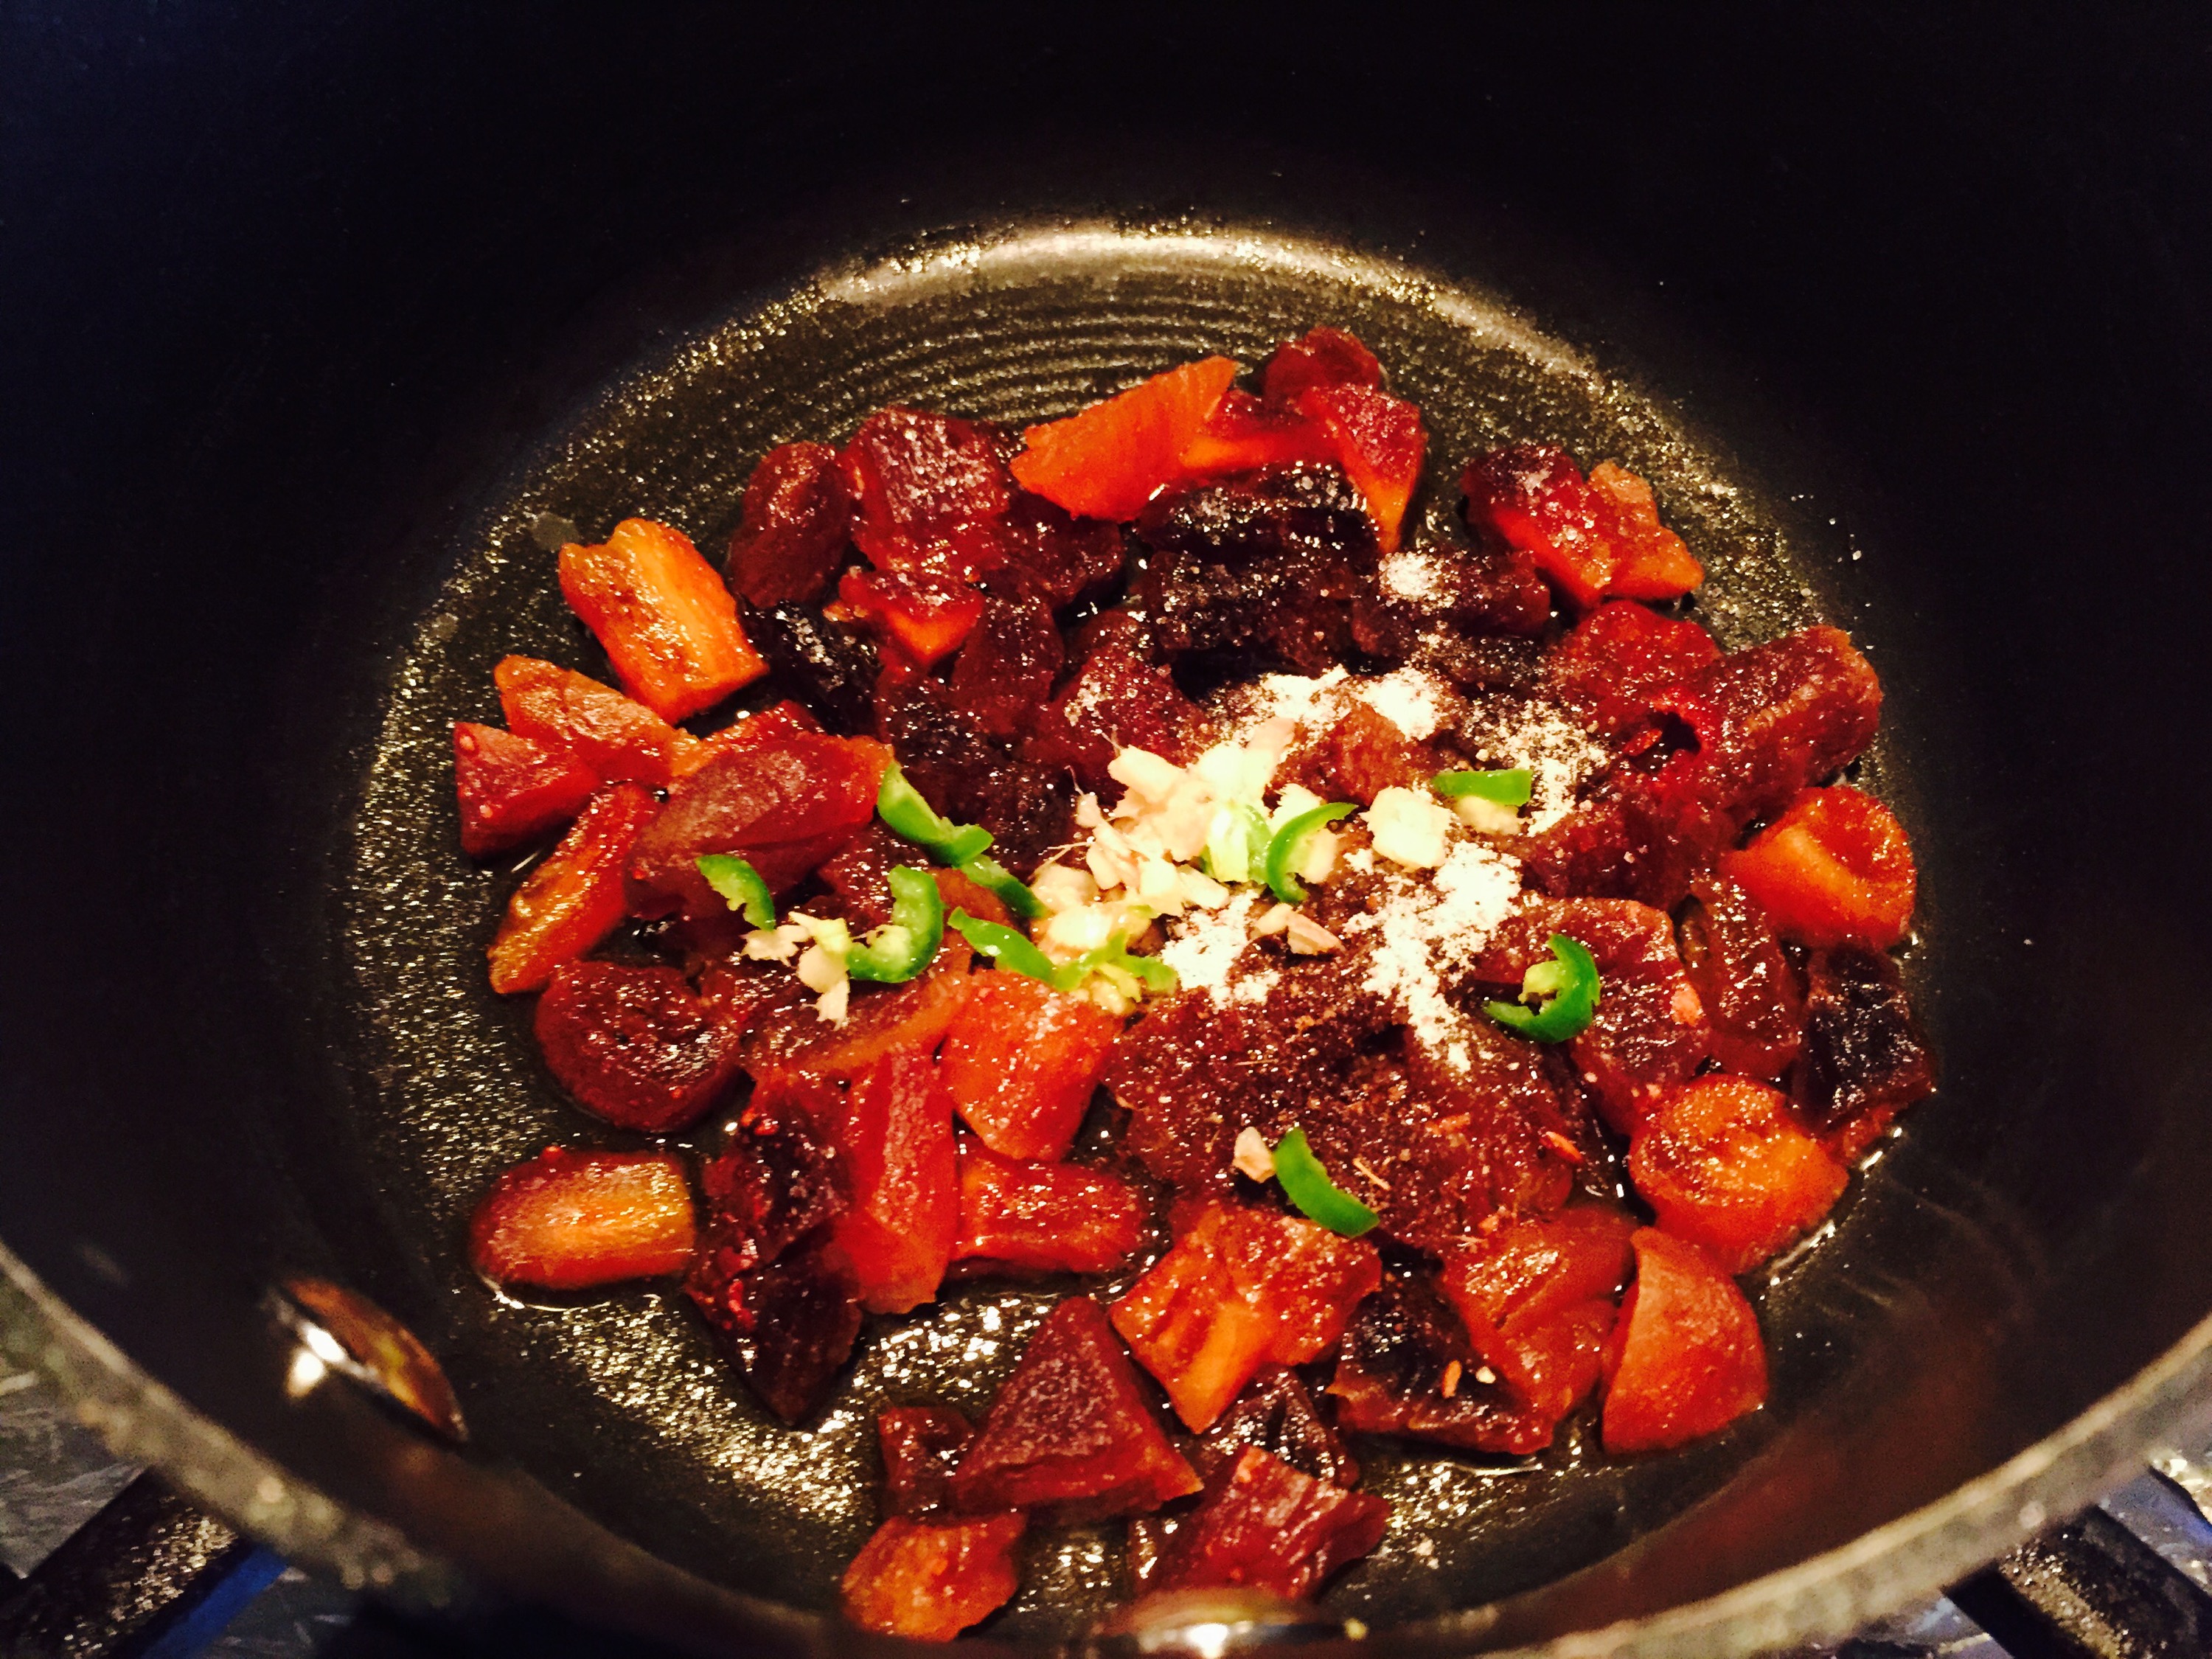
Now add sugar, roasted cumin seeds, chopped ginger, chopped green chillies, chopped mint,black salt, salt,Deggi Mirch.
Cook it on slow fire till chutney thickens and can be easily mashed with the back of a spoon. 

For paneer 
Make paneer cubes about 3/4 -1 inch thick. Make a slit in the center, make sure you don’t cut it two pieces.
Mix salt and turmeric and coat the paneer with that mixture.

IMG_3726-3

In a separate bowl mix mustard oil, turmeric, ginger garlic paste.

IMG_3727-0
Stuff the paneer pieces with the apricot chutney. Make sure that the chutney is pushed in all the way through so each bite will get a bit of chutney with it.

IMG_3728-0

Cover this stuffed paneer with the yogurt mixture.

IMG_3729
Now heat a little fat in a pan and pan seared this stuffed paneer till it gets a nice golden brown color.

Close up Apricot Paneer Tikka


Categories
Italian Main Dish Pasta

Two cheese Gnocchi with Brown butter-sage sauce

I love making things from scratch. Although in this day and age where everything is instant and easy, I feel that there is very special when it is made at home from scratch. Agreed that it involves time and effort, but I feel that if I can not spend time and effort on my happiness then what is the point. My grandma used to say in Marathi ( my mother tongue) ,” कशासाठी  पोटासाठी ” which roughly translates to ” everything is for your stomach”. It is so true. You work hard to earn money so you can eat well and be healthy. So I think this extra effort is worth it when it means the health and happiness of you and the loved one.

Also, I think there is something immensely satisfying about working the dough with your hands, so I decided to make the Gnocchi at home. When you think of Gnocchi, you think of these tiny little dumpling that are made with some kind of potato and flour. However the potato was introduced to Europe only in the 16th century but history of Gnocchi goes back much further than that. Gnocchi was made with flour of some kind, egg and some kind of cheese. So when I wanted to do a series of posts on Ricotta, I decided to make the gnocchi with Ricotta.  I found this recipe on Wisconsin cheese site, and looked very tempting. When I read that it was by Michael Symon, I was sure that it would turn out good.

I am plan to post a series on Ricotta cheese.

So here is ‘Two cheese Gnocchi with brown butter sage sauce’- my first dish from the series on Ricotta cheese.

Brown Butter sauce-sage Gnochhi

INGREDIENTS:

For the gnocchi:
3/4 cup all-purpose flour, plus additional for dusting
1/4 cup (3 ounces) Parmesan cheese, freshly grated
Zest of 1 lemon, grated
1 cup (8 ounces) Part-skim ricotta cheese, drained
1 egg

For the sauce:
6 tablespoons unsalted butter
1/2 shallot, thinly sliced
12 sage leaves
1 garlic clove, thinly sliced
Juice of 1 lemon
2 tablespoons water
1/3 cup (about 2 1/2 ounces) Parmesan cheese, freshly grated
12 fresh parsley leaves

Ingredients-3
Ingredients for the sauce

Method:

Make the gnocchi:

Combine flour, parmesan and lemon zest in bowl. Add ricotta and egg. Mix well with wooden spoon or your fingers until dough just comes together. Do not overwork or dough can toughen.

Dough-2
Dough

Scrape dough onto a well-floured surface and form into a roll. Cut dough into fourths, using bench scraper or knife. Gently roll each piece into foot-long ropes, about an inch in diameter, flouring as needed to prevent dough from sticking to surface.

Place dough ropes on lightly floured platter or sheet pan; refrigerate for 30 minutes or up to two hours, uncovered, to rest. As you may know, anything that uses flour should be allowed to rest a while. This allows the flour to bloom.

Place ropes on floured surface; cut into 1/2-inch pieces with scraper or knife.

Typically gnocchis are curled on a board or with the fork. Since we are using the ricotta cheese, the dough is very delicate so instead of using the curling method, we will just cut the dough.

https://youtu.be/mv2fTfyHohk

Finish the dish

Heat butter over medium-high heat in sauté pan large enough to accommodate all gnocchi without crowding.

https://youtu.be/bJUYRBjkz74

When butter foams, add gnocchi—do not crowd—and cook, turning as necessary, until brown and crisped on all sides, 5-6 minutes.

https://www.youtube.com/watch?v=kPqn9kchy6I

When gnocchi are almost cooked, lower heat to medium and add shallot and sage leaves.

http://youtu.be/IgkNtgL0Urw

Cook briefly to release flavors; then add garlic, lemon juice and water.

http://youtu.be/jmZxUv-y140

Cook briefly, allowing sauce to emulsify and thicken a bit. Add 1/3 cup parmesan and parsley leaves. Toss to coat gnocchi. Spoon gnocchi and sauce into shallow bowls.

Serve immediately else you will end up eating all of it.

Gnochhi Close-up
Gnocchi
Gnochhi
Gnocchi

Today I served it with grilled marinated portabella mushrooms.

Mushrooms and vinegar
Categories
Appetizer Chicken Fusion Healthy foods Indian Side dish Sprouts Vietnamese

Chicken tikka vietnamese Spring Rolls

When I have an idea in mind, I can not rest easy until I execute on it. One such idea was variations on the Vietnamese Spring rolls. I wanted to try making an Indian version, I thought it would go really well with the concept.But before we talk about that recipe, let me tell you my  first encounter with these spring rolls.

The first time I ate these spring rolls when I was pregnant with my first child. I had a terrible time with the morning sickness and could not keep anything down. Around that time we were invited to my husband’s colleagues wedding reception. The bride and groom both were of Vietnamese origin and so at  the celebrations the food served was Vietnamese.

Forget eating and enjoying, I could not even stand the smell of most of those things. It had a lot of fish sauce,and all kinds of meat. Everyone tried to see what I can eat, offered so many things but nothing felt right at that time. Then someone got these interesting looking things that they called ‘Spring rolls’. They were nothing like the ones I knew from back in India. They did not look fried and almost looked transparent. I loved those..I loved the fresh basil and mint and the crunchy bean sprouts… it was perfect.

I have been making these for a while now and love making variations.

Today’s variation has a Indian touch. The meat used is the pickled chicken, I think it compliments the fresh mint and cilantro.

This recipe for the Achari chicken is a perfect addition to the fresh ingredients of the spring roll. You can also use chicken tikka or any other nicely seasoned meat. I have made this with marinated Tofu/Paneer to make the vegetarian/vegan version. It tastes just as well.

Achari chicken spring roll

Ingredients:

Chicken:

  • 3/4 lb boneless Chicken ( for vegetarian option use Tofu/Paneer)
  • 2 ½ tablespoons Achari Masala
  • 1/4 lb Hung Yogurt (this is basically yogurt hung in a cheese cloth)
  • 1 tablespoon refined flour
  • 2 tablespoons Mustard Oil

Other ingredients

  • Bean Sprouts
  • Few green lettuce leaves
  • Thin rice noodles, cooked according to the packet
  • Julienned carrot
  • Few mint leaves
  • Few cilantro leaves
  • Few Rice paper sheets

IMG_2509

Method:

  • Heat Mustard Oil in a 10 inch nonstick pan until it smokes.
  • Add Achari Masala to the pan. Cook the spice mix for 20 seconds, then remove from heat. Let cool for 10 minutes.
  • In a glass bowl, mix yogurt and cooked spices well. Make sure to include the oil.
  • Cut cubes of chicken & marinate it with the pickled curd marinade for minimum 60 mins.
  • IMG_3233

Now cook the chicken on medium flame, add refined flour and cook for 8-10 mins. Once cooked evenly, keep it aside.

Assembly

Dip the rice paper in cold water for 5 seconds. Take it out and shake off the excess water. Make sure you use cold water and also don’s leave the rice paper in the water for too long. Although when you take it out, it might still feel stiff but it does soften up.

IMG_2510

Lay the wet rice paper flat on a board. Layer all the ingredients. In works the best to start with a piece of lettuce, this helps provide a base and stability to the roll. Now continue with the rice noodles, Chicken, sprouts, carrots, cilantro, mint.

Now roll like a burrito making sure that no vegetables are poking out. We want our spring roll to look pretty.

IMG_2513

Make sure that you keep these covered so they don’t dry out.

Cut in half and serve. Depending on the flavor of the chicken you can pair with the right sauce. For example when I make it with an indian flavored chicken, I serve it with a Tamarind-date chutney.

IMG_0269


en_USEnglish