Categories
coffee Cookies dessert Fusion Greek Lebanese Turkish

Spiced nut Baklava with Coffee Syrup

I grew up in a small town in India in a home with my grandma, Uncle-Aunty, cousins and others. Yes, there were many people who have lived in our home, maybe because they needed a place to stay for a short term, or they were studying something and needed a bit of help. Now that I think about it, I really admire my elders for embracing everyone and treating them like family.

Our home was quite large, it probably started as a small home but grew bigger with the family. It had a small courtyard which was one of my favorite spots in the house. The courtyard was surrounded by different parts of the house on three sides and the fourth side was a wall between the courtyard and the street. The courtyard had a giant wooden door, on either side of which was small little enclave where my grandma would light lamps in. One part of the house was used by my Grandfathers brother. He was a professor and a very brilliant one, he would hold his classes where he taught kids for free in that part of the house. Kaka Ajoba, as I fondly called him, also taught me how to pick vegetables in the market.

He was the first one to have TV in the house, our main house did not have until much later. So come Sunday all the kids would be at Kaka Ajoba’s watching all the serials like ‘Ek, Don, Teen, Chaar’ or ‘Vikram and Vetaal’.

Malgudi Days was one of those serials that we were allowed to watch. The minute this music came on, no matter where in the house we were, we would run to Kaka Ajoba’s and plop ourselves in front of the TV. The little Swami had become a part of our lives and that Malgudi Train station made us believe that the town was real. There was something really genuine and pure about that serial, just like my childhood, well done R.K. Narayan!

When I saw the Malgudi Days coffee, it immediately transported me back to those days, and more I read about it I felt a connection. Its a company started by a Mom and Son duo in the quest of getting the best filter coffee in Australia. Their coffees come from the majestic slopes of the Bababudan highlands of South India, situated in a shaded region 4,000 feet above sea level. The coffee is roasted in Sydney and brings you back to the streets of South India where you can smell a beautiful aroma of coffee as you enjoy your ‘tiffin’ in the morning .

Malgudi day contacted me and sent me their products. When I received my package I was very surprised, not only had they sent me boxes of coffee to try but also a set of tumblers along with a south Indian coffee filter to make the coffee with. The quality of the stainless steel is excellent and so was the coffee.

You can check out their products here https://www.malgudidays.com.au/

You guys might know that I am a tea addict, a cup of good old Indian chai is an absolute necessity to start my day right. However when I like to drink something other than tea, my favorite is the good old Indian Filter coffee. I of course enjoyed Malgudi Days’s coffee with my Paniyarams but also decided to make something that not only can be enjoyed with the coffee but also uses coffee in the recipe.

When I talk about my childhood memories I think of my paternal grandmother who used to drink only coffee, she never had tea. She would make a coffee using coffee grounds that were freshly ground in a local shop called Metro. She would always add a pinch of nutmeg in her coffee. This type of coffee was also normally served at ‘Haldi Kumkum’ which is a social women’s gathering, in fact it was also called ‘Haldi Kukuwachi coffee’ in Marathi. So when I had the Turkish coffee, which often has cardamom and nutmeg, I was quite surprised and wondered how my grandma must have learnt about this Turkish coffee when there was no internet.

I decided to draw inspiration from the Turkish coffee and my grandma to make this dessert using Malgudi Days’s coffee, it somehow resonated with the theme of nostalgia and coffee.

Baklava which is a quintessential dessert from countries like Lebanon, Greece, Egypt and Turkey and each one of them claims that it originated there. I thought the Turkish version which does not use any orange blossom or honey would pair well with the coffee and the Indian flavors that I wanted to incorporate.

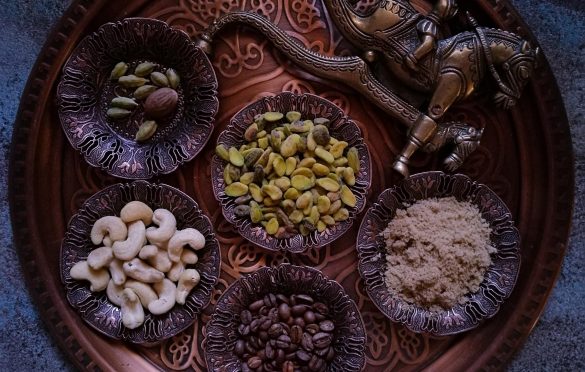
I have not only added some nutmeg to the nut mixture along with the cardamom in the syrup, the syrup also has the coffee decoction I made with Malgudi Days traditional filter coffee blend.

Spiced Nut Baklava with Filter coffee syrup

A dessert Pastry filled with a spiced nut mixture and drizzle with a coffee syrup, this is a treat to be enjoyed on it own or with a cup of good coffee.

Course cookies, Dessert, tea
Cuisine greek, lebanese, turkish
Keyword baking, baklava, cardamom, cashew, coffee, filter coffee, nutmeg, nuts, pistachio, turkish coffee
Prep Time 1 day 30 minutes
Cook Time 30 minutes

Ingredients

  • 6 Tbsp Unsalted butter melted
  • 1/2 Cup Unsalted raw pistachio
  • 1/2 cup Unsalted, raw Cashews
  • 6 tbsp packed light brown sugar
  • 1/2 Tsp Ground nutmeg
  • 1/2 Tsp Kosher salt
  • 1/2 Cup Granulated sugar
  • 1/4 Cup Water
  • 1/3 Cup Strong decoction of Filter coffee
  • 1 Tsp Ground cardamom
  • 1-2 Cardamom pods
  • 3 6-by-13-inch sheets phyllo

Instructions

Make the filling

  1. Heat the oven to 350°. In a food processor, combine 6 tablespoons butter with the cashews, Brown Sugar, nutmeg, and salt and chop it finely.

Make Syrup

  1. In a small saucepan, combine the granulated sugar, add water add the cardamom powder and the pod skin. Bring to a boil and cook, stirring, until the sugar dissolves, about 2 minutes. Continue to boil for a min. Remove the syrup from the heat, add coffee decoction and let cool; discard the cardamom skins.

  2. Grease an 8-inch square metal baking pan with some of the remaining melted butter.

  3. On a board, lay 1 sheet of phyllo dough so the short sides are parallel to you. Brush the sheet with some butter and place the second sheet over the first. Brush the phyllo with butter and cover with the third sheet. Brush the last phyllo sheet with butter.

  4. Cut the phyllo stack in half lengthwise, and then cut each rectangle crosswise into 5 equal small rectangles. Put about 2 tablespoons of the nut filling in a line along the long edge of 1 of the phyllo rectangles. Roll the phyllo around the filling into a roll and place the roll in the prepared baking pan. Repeat with the remaining filling and phyllo rectangles to make 9 more rolls. Make sure the rolls fit snugly in the pan so they don't open while baking and the filling does not ooze out

Bake

  1. Brush the remaining melted butter over the top of the rolls and bake until light brown and crisp, about 35 minutes.

  2. Remove the baking pan from the oven, pour the cooled coffee syrup over the baklava logs, and let cool to room temperature.

  3. Turn each log over and let stand for 15 minutes to allow the syrup distribute itself through the rolls

Recipe Notes

Baklava is made using various nuts, the more common ones are walnuts, pistachio, however you can use any nuts. 

You can make any shapes you would like, you can make a huge tray and cut into diamond or squares etc. 

Lebanese version of Baklava uses orange blossom water, Greek version uses honey instead of sugar syrup etc, but all the Baklava tastes amazing 

Categories
bread Fusion Jewish Maharashtrian

Til-Gul Babka Jewish Indian bread

Nothing is more appetizing than the smell of freshly made bread. Be it the fresh roti that is made right on the stove top or a loaf of bread baked in the oven.. it calls everyone to the kitchen and around the dining table. I am not much of a baker, I do bake cakes occasionally but it does not come to me naturally. I feel cakes are way easier than the breads, when you start baking breads, you are going closer to the science than art.

After MasterChef, one of the goals has been to bake more often and since my family is not too much into the cakes, and I like to challenge myself, I am planning to bake more breads and try new techniques.

January is one of my favorite months. This is the month of resolutions, new beginnings and many more things. One of the things is Hurda, its my most favorite thing on this face earth, and this is the time we celebrate Sankranti. This is the only festival in Maharashtra that is based on a Solar/Gregorian calendar, rest of them are all lunar calendar based. Sankranti is celebrated on the 14th of Jan, and other parts of India celebrate this festival with different names, Pongal in southern India, Bihu in Eastern India, Uttarayan in Western India and Lohri in Northern India.  The common theme is great food and happiness and most of the  sweets  are made from Sesame seeds and Jaggery. Both these foods create ‘heat’ in the body and hence eaten during this winter season.

Going back to my baking breads, as you know, I love combining flavors. I had seen this sesame bread recipe on pintrest and that is also my source of inspiration today.So I decided to make this bread which is fit for the Sankrant and something new. Here it comes;

Til Gul Babka


img_8957-2

I know right, it sounds crazy but tasted yummy, if you are into sweet breads, you might want to give it a try. This recipe is quite versatile and can be easily made into a savory bread as well, all you have to change is the filling and you are good to go.

I had read about this technique of ‘Tangzhong‘ and decided to try using it with this bread. I think it definitely helped keep the bread very moist. Tangzhong is a a Japanese technique, it makes for a very sticky dough that is very tricky to handle, but thats what makes for the very soft final product.

Tangzhong is nothing else but a paste made with flour and water, you cook it to almost a roux like consistency. You cool it and mix it in the dough.It sounds so simple and it is, but let me tell you, it created incredibly soft almost pillowy bread.

I think I am so in love this technique that I think I will end up using in everything I bake. 🙂

Back to the recipe

Ingredients

Tangzhong

  • 50 g  Flour
  • 1 cup milk

Bread dough

  • 350 g Bread Flour ( about 3 cups)
  • 1/2 salt
  • 65 g sugar ( about 1/4 cup)
  • 1 egg
  • 1/2 cup warm Milk
  • 2 tsp Yeast
  • About 1 cup Tangzhong
  • 1 egg for egg wash

Filling

  • 1/2 cup Crushed Jaggery ( you can use dark brown sugar if you can not find jaggery)
  • 1/3 cup roasted peanut
  • 4 tbsp roasted sesame seeds
  • 1/4 tsp cardamom powder
  • 2 tbsp molasses
  • 4-5 Tbsp ghee ( or softened unsalted butter)

Method

Making Tangzhong

  • Mix in the water and flour to form a good slurry
  • Cook it on low flame till it thickens. It should be a little less thick that a mashed potatoes. One way to check is if you stop stirring, does the mixture stays in circles and you can see the bottom of the pan
  • Take it off the heat, cover with a plastic wrap, making sure it touches the surface of the paste. This will ensure that no crust forms
  • Cool the Tangzhong to use later

Making the filling

  • Grind all the ingredients except the ghee and molasses
  • Mix the powder in ghee and molasses to make a paste

Making the dough

  • Warm up the milk and add the yeast. Leave it aside for 10-15 mins for it to foam up
  • Until then mix, Flour, Salt, sugar, sesame seeds
  • Add an egg and mix
  • Now add the yeast and milk mixture and mix for 30 secs
  • Add the tangzhong that is cooled
  • Now knead the dough in the stand mixer for 10-15 mins
  • Keep adding softened butter while the mixer is running
  • The dough will be a very wet dough, don’t worry. If the dough sticks to the bottom of the bowl, don’t worry
  • Take a greased bowl and transfer the dough.Let the dough roof for at least 2 hours.
  • I like to proof my dough in the fridge, so I can use it when I am ready
  • The dough should double in size

Assembling it together

  • Punch and deflate the dough
  • Roll it into a reactangle
  • Spread the filling evenly

Shaping the bread

  • Take the rolled log and cut it along the length with a sharp knife
  • Twist the two parts together to form a braid keeping the cut side up
  • Take a bread loaf pan that is greased and lined with a parchment paper
  • Add the dough in it and let it rest for at least 60 mins

Baking

  • Heat the oven at 350 F
  • Brush the dough with egg wash and bake for 25-30 mins in a 350F

Note:

  1. This dough was a little more than a standard bread loaf can handle, so I removed about 1/3 cup dough before shaping it
  2. If you can not find molasses, you can substitute with honey

img_7265


Categories
dessert Fusion Master Chef India

Star Anise Panna cotta with Khubani

This is where my Master Chef  journey began. A very close friend really pushed me to sign up for Master Chef Auditions. The auditions were on Saturday and Friday evening at 7:00 PM I had not idea what I would bring for the auditions. I decided to make this recipe which has been my family favorite. I walked into the auditions with the Panna cotta and heart beating fast.

Star Anise Panna cotta

pannacotta-day-1

 Panncotta is an italian word that translates to ‘ Cooked Cream’. It is such an easy to make dish and yet it is very easily customizable. You can change flavors, pair it with different things and the best part, it looks super fancy.
I tried quite a few recipes till I settled on this one.  It tastes just like the panna cotta served at Italian restaurants. I like to serve it with fruits or even chocolate sauce, or stewed fruits.
Today I have flavored it with one of my favorite spices, Star Anise & served with stewed apricots. In Hyderabad ( India) there is a sweet, Khubani ka Meetha, and my inspiration for  today’s dessert comes from that.

Panna Cotta

Ingredients

img_5030

  • 1/2cup  milk
  • 1 (.25 ounce) envelope unflavored gelatin ( I used Knox powder today)
  • 2 1/2 cups heavy cream
  • 1/2 cup white sugar
  • 6-8 Star anise
  • 5-6 Whole black pepper

Method

  1. Blooming the gelatin: Pour milk into a small bowl, and stir in the gelatin powder. Set aside.This will help gelatin absorb the milk and mix well
  2. Pound the spices in a mortar and pestle. Keep them coarse
  3. In a saucepan, stir together the heavy cream and sugar, and set over medium heat until it is lukewarm, and set it aside for 1 hour or so. Longer the better.
  4. Setting aside the cream helps the flavors of spices seep into the cream beautifully.
  5. Bring to a full boil, don’t let it over flow. Pour the gelatin and milk into the cream, stirring until completely dissolved.
  6. Cook for one minute, stir so the gelatin does not form a lump.
  7. Remove from heat, strain and pour into  individual ramekin dishes.
  8. Cool the ramekins uncovered at room temperature.
  9. When cool, cover with plastic wrap, and refrigerate for at least 4 hours, ideally  overnight before serving.

Stewed Apricots

Ingredients

  • 10-12 Dried Apricot
  • 1/4 cup white sugar
  • 2-3 Star anise
  • 2-3Whole black pepper
  • 1/2 cup water

Method

  • Chop the apricots fine
  • Add sugar, water, spices and apricots in a small sauce pan
  • On a low flame cook till the apricots are softened and the water gets nice and syrupy.
  • Remove the spices before serving


Pistachio Rose caramel

Will Update the recipe soon.

To serve

Demold the pannacotta and serve with the stewed apricot. I also love to use candied Pistachio while serving.


Categories
Breakfast Fusion

Indian style french toast

I am a firm believer that a good breakfast is absolutely necessary to keep you going the whole day. One of my favorite breakfast food is eggs. I like eggs in any form. My mom tells me that when I was a teenager, I used to say that I had to eat eggs and bread everyday for the rest of my life, I will be very happy.

One of the recipes that my mom makes is the ‘desi styled, spiced French toast’. She takes all the ingredients of the typical Indian Style Masala omelet  like chopped onion, tomatoes, green chili,cilantro and use it as a batter for the french toast. It tastes just divine. I love eating it with Maggi Hot and Sweet sauce. She toasts the bread slice a little before she dips in the batter which I think makes a big difference.

So when my friend Ruchi Airen posted a recipe of Spicy Buttermilk French Toast, I knew I had to try it. So here is my take on Ruchi’s recipe. BTW, she is an amazing cook, I am planning to try her detox plan soon.

IMG_0221

Ingredients:

2 eggs

2 tbsp chopped onion

2 tbsp grated Lauki (optional but a good way to sneak veggies in)

1/4 tsp chopped green chili

1 tbsp chopped cilantro

1 tsp Pavbhaji Masala ( or Garam masala)

1/4 cup buttermilk

1/3 cup Shredded cheese, I used the mexican blend I had on hand

2 multigrain bread sliced

oil  

IMG_0214


Method:

Whisk the eggs with all the ingredients except cheese and buttermilk.


IMG_0215

Add buttermilk and cheese and mix well.

IMG_0217 

Dip the bread slices and make sure the batter coats the slices from both sides.

IMG_0218

On a heated pan cook in a little bit of oil it till brown on both sides.

IMG_0219

Your healthy breakfast is ready.  

My kids just loved it. I was happy because I got them to eat ‘Lauki without them realizing it 🙂 . 

Categories
Appetizer Fusion

Thai Paneer Pinwheel


Summer goes by too quickly…I feel that every year when I start back to school shopping. We decided to celebrate the last weekend in summer before the schools open with a backyard jacuzzi party..the plan was to keep things simple. Everyone makes an appetizer and then one friend would make khicadi ( a dish made with rice and lentils). Since I love to put a twist on your typical recipes, I decided to make pinwheels but with ‘Thai Touch’. It is a quick simple recipe that uses that the farmer’s market bounty. It can be put together in less than 30 mins if you have all the ingredients at home.

You can make many versions of this, like I make Chinese, Mexican and of course Indian 🙂

Thai Paneer Pinwheels


IMG_0621
Thai Paneer Pinwheels

Ingredients

Filling

IMG_0608
Ingredients

1 cup grated Paneer ( Indian Cottage cheese)

1/2 cup onion finely chopped

1/4 cup red bell peppers finely chopped

1/4 cup green bell peppers finely chopped

1 green chili chopped fine

1 tbsp  garlic  finely chopped

1 tbsp ginger finely chopped

1 tbsp cilantro chopped

1 tsp thai basil finely chopped

1 tsp thai curry paste

1 tsp sriricha sauce

salt to taste

1 box Crescent rolls


Method

Preheat 350F.

Grate or crumble paneer.

Grated paneer

Step 1

Unroll the crescent roll. You will get a rectangle. Seal the perforations gently to get a uniform rectangle

Step 2

Chop all the vegetable fine

Chopped vegetable


Step 3

Mix all chopped vegetables with the grated paneer. Add all the sauces & salt to your taste and mix well.

Spread the mixture evenly on the rectangle dough. Make sure you leave some space around the edges. The filling tends to come out if spread it all the way to the edge.

Roll it up gently, try not to press it while rolling. If the edges open up while rolling, just pinch and seal it. Cover it in a plastic wrap. Keep it in the fridge for 10-15 mins. This makes it easy to cut.

Take the roll out of the fridge. Cut it in 1/4 inch slices.

IMG_0618

While cutting use the sawing motion so the rolls don’t get flattened while baking.

Arrange the cut rolls filling side up on a greased baking tray. Make sure you keep some distance between the rolls else they will be stuck together and will not have enough room to spread while baking.

IMG_0619


Bake for 18-20 mins at 350 F.

Pinwheels ready


When ready serve with hot sauce or any other condiments of your choice.


Note:

I have made other variations with Tandoor Paneer, Mushroom-goat cheese and even sweet kind with apple filling


en_USEnglish